Deploying a Kong Gateway Data Plane With Pulumi
Infrastructure as code is a core component of all modern SRE team's day-to-day work. There are plenty of options available, but the one that I'm most excited about is Pulumi. Instead of writing a domain-specific language (DSL) to configure your infrastructure, Pulumi lets you write the language you already know. For me, that's Typescript, but if you prefer Go, Python or DotNet programming languages, that's an option too.
As with all of these tools, though, provisioning your infrastructure is only half of the battle. Once you have your virtual machine or Kubernetes cluster available, you must configure it to run your application.
In this post and video, we will provision a new AWS EC2 instance and configure it as a gateway data plane for Kong Konnect.
Configure Your Environment
The first thing we need to do is install Pulumi. It's available on most package managers or as a prebuilt binary on their website. Go ahead and install it now.
You'll also need to log in to Pulumi. If you don't have an account yet, you can sign up.
> If you don't want to sign up for an account, you can use the local driver by running pulumi login –local to store your infrastructure state locally.
You'll also need to configure the AWS credentials file so that Pulumi can call the AWS API to create resources. You can create an AWS access key and secret on your security credentials page in the portal and follow the AWS setup guide on Pulumi to create the required configuration file.
Finally, you'll need a Kong Konnect account if you don't already have one.
Test Your AWS Credentials
Now that you have Pulumi installed, we can bootstrap a new Pulumi project:
This creates a new Pulumi project with a new AWS S3 bucket and returns the bucket ID as an output. Now's a good time to check if you configured your AWS credentials correctly, so run pulumi up to try and create the bucket (don't worry, we'll delete it again in a second).
Pulumi will ask you which stack you'd like to use (choose dev) before showing you a preview of the changes it will make. Accept the changes and confirm that you'd like to apply the update. Pulumi will now create your S3 bucket, and you should see a screen that looks like this:
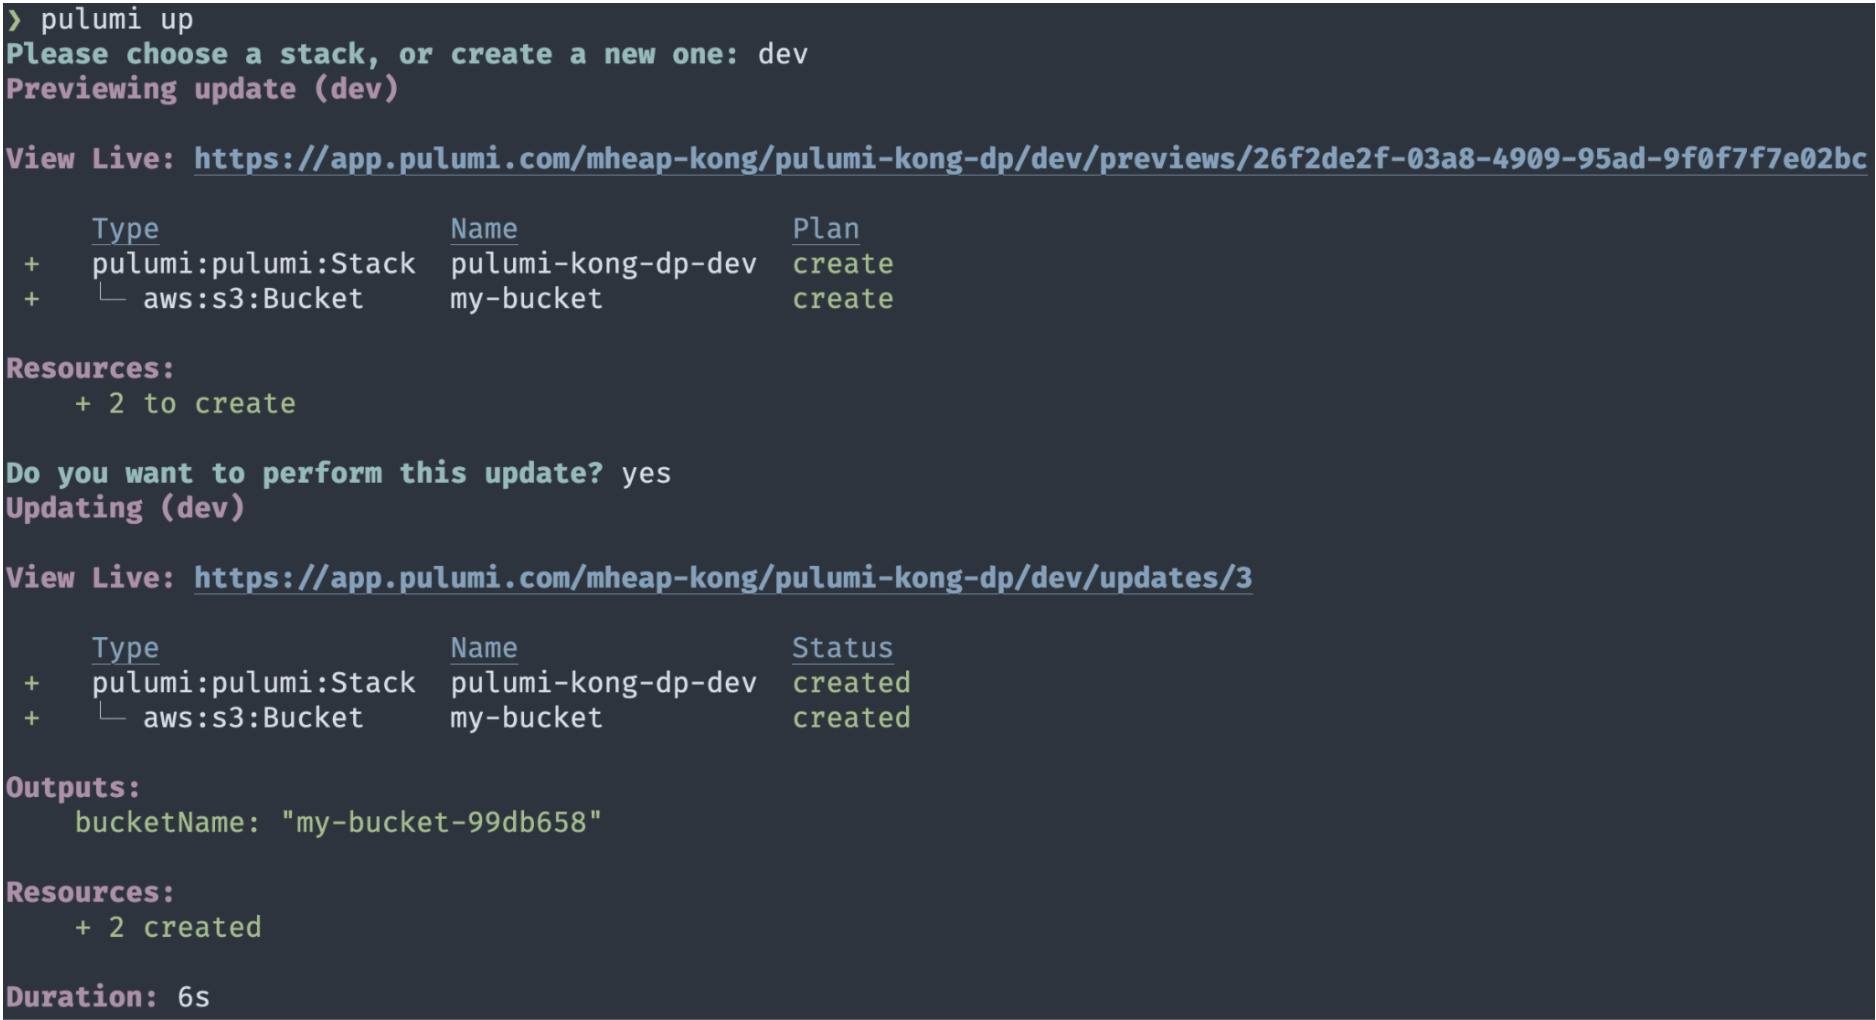
Switching to the AWS console, you can search for my-bucket, and it should show your newly created bucket:

Congratulations! You've just installed Pulumi and created your first piece of infrastructure using its Typescript SDK. Let's go ahead and delete that bucket now by running pulumi destroy, as we don't need it for the rest of this blog post.
Create an EC2 Instance With Pulumi
We will deploy a new Ubuntu 20.04 instance to EC2 to act as our Konnect data plane. We need to use Pulumi to fetch some configuration values that we need, such as the AMI ID.
Open up index.ts and replace the contents with the following:
This gives us the AMI ID for the most recent release of Ubuntu 20.04 to use later when we create a new EC2 instance.
In addition to the AMI ID, we also need to create a new security group. This group needs to allow SSH access on port 22 for provisioning the machine, plus inbound traffic on port 8080 (the Kong proxy port) and outbound traffic on all ports. To create this security group, add the following to index.ts:
Finally, we need to specify which SSH key to use when accessing the new server. You can create a new key by providing the public key to aws.ec2.KeyPair, but to keep things simple, I used an existing SSH key that I had registered with the name "mheap-gateway."
At this point, we have everything we need to create a new EC2 instance, so edit index.ts once more and add a new EC2 instance definition:
By putting together the AMI ID, security group and EC2 instance configuration, we now have a Pulumi configuration that deploys everything we need to run a new server using AWS. Run pulumi up now and watch as it creates a new server.
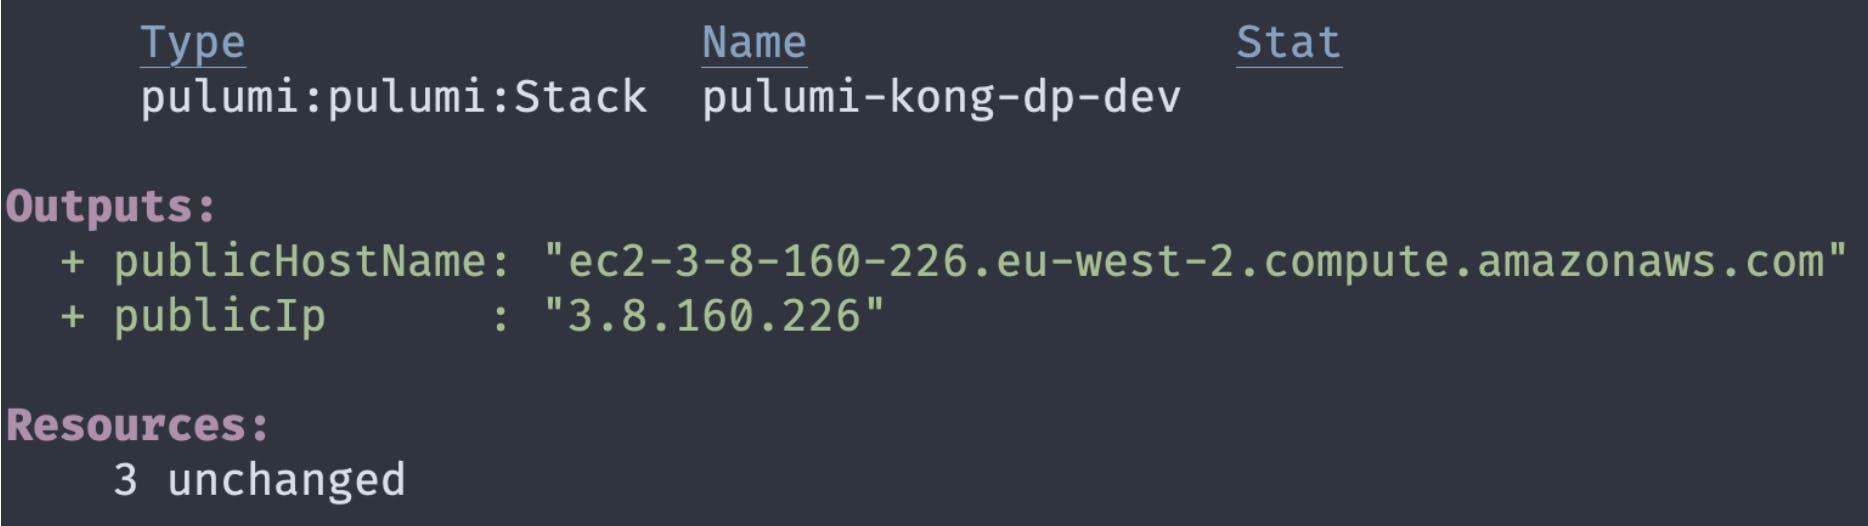
This is great, but we don't know how to connect to the server, as we don't have its public DNS name. Let's make one final change to index.ts to export that data as an output by adding the following to the end of the file:
Pulumi automatically shows any exports in the output, so if you run pulumi up one more time, you should see your server's public IP address and hostname.
Now that we've got a server up and running, it's time to install the Kong Gateway and configure it with the correct certificates that allow you to use it as a Konnect data plane.
Fortunately, there's a kong-pulumi package which takes care of this for you! Run npm install kong-pulumi — save to install it, then add the following to the bottom of index.ts:
This code configures the connection details that the plugin requires to connect to your new server. Make sure to change the path to the private key to point to the key you used in the previous step.
Next, we need to provide authentication details for the Konnect API, which we use to fetch certificates. We use the Pulumi secrets system to keep these secure. Run the following to set your Konnect username and password so that you can use them in index.ts:
Once that's done, we also need to configure our code to use those secrets. To do so, add the following to the bottom of index.ts:
Finally, we need to run the kong-pulumi package to provision our data plane. Add the following to index.ts to provision the server using the connection details and authentication credentials that we created above:
You can see that we pass in connection and auth, along with the version of the gateway that we want to install. Finally, we use a Pulumi feature to specify that this provisioning should not run until the server has finished provisioning.
Run pulumi up one more time to execute the provisioner and watch as Konnect reports a new data plane coming online
Conclusion
You just created a new AWS security group and EC2 instance, then provisioned it as a Kong Konnect data plane in less than 70 lines of configuration!
In a world where everything is moving towards version-controlled designs deployed via CI/CD, Pulumi is a great fit. Couple infrastructure as code with APIOps, and you have a solid workflow to design and deploy your APIs to infrastructure that you can manage using the same workflows as your Kong Gateway.